Advanced Texturing
You have already seen how you can apply textures on meshes, but here you are going one step further, with more complex textures like mirrors, videos, bump mapping, and multi-texture.
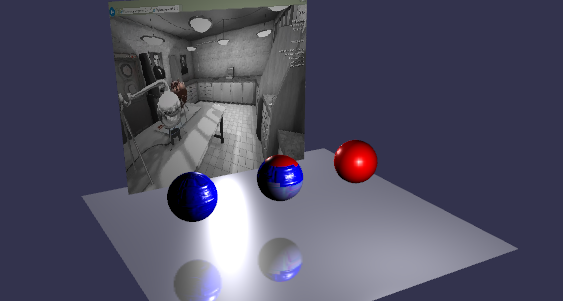
A picture from our Advanced Texturing playground demo -
How can I do this ?
These new types of textures are considered advanced because we are not used to dealing with them, but you’ll see that it is very easy to create them with JavaScript and Babylon.js!
Mirror
Mirror textures are used to simulate “mirrors” (!) which means that babylon.js will compute the reflection and fill the texture with the results. A mirror texture must be set in the reflectionTexture channel of a StandardMaterial :
var mirrorMaterial = new BABYLON.StandardMaterial("texture4", scene);
mirrorMaterial.reflectionTexture = new BABYLON.MirrorTexture("mirror", 512, scene, true);
mirrorMaterial.reflectionTexture.mirrorPlane = new BABYLON.Plane(0, -1.0, 0, -10.0);
mirrorMaterial.reflectionTexture.renderList = [sphere1, sphere2];
A mirrorTexture is created with a parameter that specifies the size of the rendering buffer (512x512 here, better reflection quality if increased). Then you have to define the reflection plane and a render list (the list of meshes to render inside the mirror).
Mirrors can be blurred if you set mirror.blurKernel = 32. You can also control the resolution of the blur relatively to the size of the mirror with mirror.blurRatio = 0.5.
You can also use a CubeTexture as a reflectionTexture on a StandardMaterial.
material.reflectionTexture = new BABYLON.CubeTexture("textures/TropicalSunnyDay", scene);
Like the CubeTextures used in skyboxes, the textures/TropicalSunnyDay directory must contain 6 textures, covering all 6 directions of the cube. Each image must be named according to the corresponding CubeTexture face: “TropicalSunnyDay_nx.jpg”, “TropicalSunnyDay_ny.jpg”, “TropicalSunnyDay_nz.jpg”, “TropicalSunnyDay_px.jpg”, “TropicalSunnyDay_py.jpg”, “TropicalSunnyDay_pz.jpg”.
<<<<<<< HEAD
You can see this nice advanced texturing technique... in this playground scene -
, and in this Fresnel-enhanced playground scene -
, as well.
You can see this nice advanced texturing technique... in this playground scene -
, and in this Fresnel-enhanced playground scene -
, as well.
developed
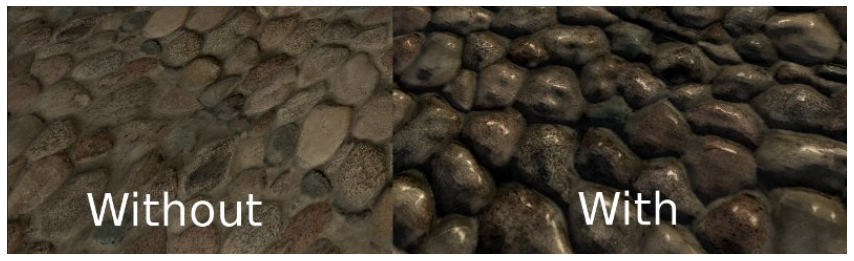
Bump Mapping
Bump mapping is a technique in computer graphics to make a rendered surface look more realistic without modifying surface geometry. This is only a texture modification, so computation is the same but rendering is much better, have a look:
The bump texture simulates bumps and dents using a map called a normal map.
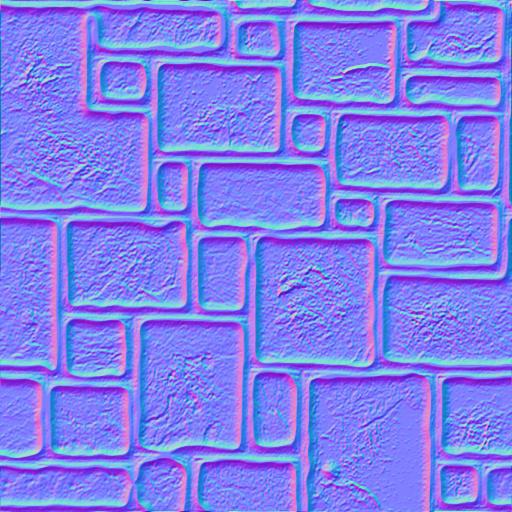
A normal map
And now, let’s code this amazing texture within two lines of JavaScript: first we create a new standard material, and then, simply declare a new bump texture:
var bumpMaterial = new BABYLON.StandardMaterial("texture1", scene);
bumpMaterial.bumpTexture = new BABYLON.Texture("normalMap.jpg", scene);
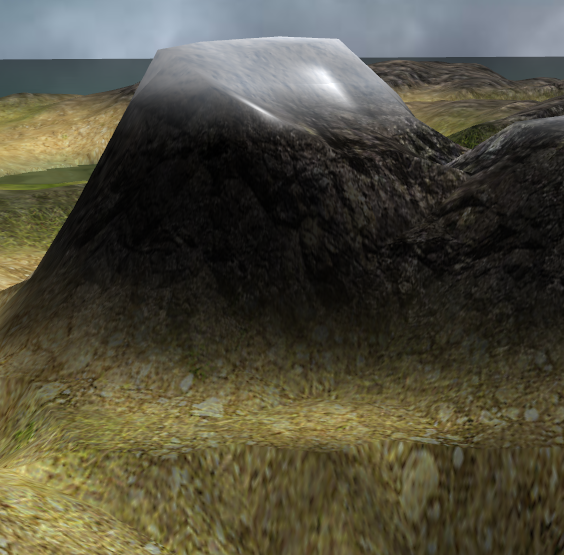
That’s it! The bump texture disturbs/perturbs the normal to produce a result like this, where you should recognize our normal map:
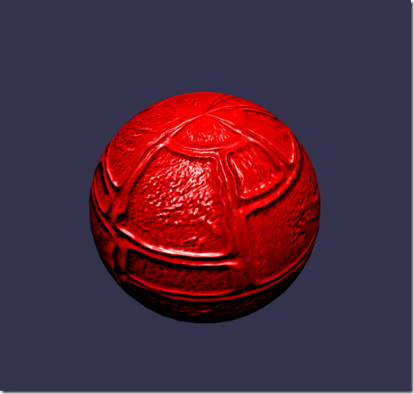
Resulting gorgeous bumpy sphere
Please note that by default, normal maps are considered to be following babylonjs format. If you want to provide a different convention normal maps, you can just set material.invertNormalMapX = true or material.invertNormalMapY = true.
-BabylonJS x-axis = left y-axis = down
-OpenGL x-axis = right y-axis = up
-DirectX x-axis = right y-axis = down
Video
If you want to display a video in your scene, the Babylon engine has a special texture for that. This special texture works similar to other textures, with the exception of a few parameters. These parameters include video urls (an url array), the size of the video texture (here is 256), the scene, and a final optional boolean that indicates if you want to use mipmap or not.
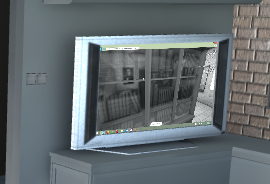
Here is an example from our Flat2009 demo. This plays a video on the demo's ZTV screen (ecran = screen).
ecran.material.diffuseTexture = new BABYLON.VideoTexture("video",
["Scenes/Flat2009/babylonjs.mp4", "Scenes/Flat2009/babylonjs.webm"], scene, true);
The VideoTexture object accepts an array of videos (to take into account various codecs). The first video in the array that can be loaded... is the one used as content source. Currently, HTML5 supports .mp4, .webm, and .ogv video formats.
The internal video DOM object is accessible via the VideoTexture.video property... which allows you to control some characteristics and monitor the status of the video (things such as play, pause, loop, autoplay, etc). See the link above for the full story.
Even though we are working with advanced texturing techniques, VideoTexture works in conjunction with a StandardMaterial. Simply put, it needs to have some light. As a handy alternative or video illumination assistant, you may want to set an emissiveColor on the base material of the mesh.
ecran.material.emissiveColor = new BABYLON.Color3(1,1,1);
Mobile devices do not auto-play videos. A user interaction (such as a tap) is required to start the video. Until the user taps, the video texture will be black. A simple way of starting the video is this:
scene.onPointerDown = function () {
  videoTexture.video.play();
}
This will start the video on the first tap in the scene. A demo can be found at https://www.babylonjs-playground.com/#CHQ4T#1 -
Starting with v2.6, we introduced the support for WebRTC. So now you can create a specific VideoTexture which will be connected to your default WebCam:
BABYLON.VideoTexture.CreateFromWebCam(scene, function(videoTexture) {
}, { maxWidth: 256, maxHeight: 256 });
The third parameter is optional and can be used to define minWidth, maxWidth, minHeight and maxHeight. These values will be used to constraint the camera resolution.
Refraction
Starting with Babylon.js 2.4, a new channel was added to the StandardMaterial: the refraction channel.
ecran.material.refraction = myCubeTexture;
The refraction engine uses a cube texture as source and you can generate it with a reflection probe for instance:
var probe = new BABYLON.ReflectionProbe("main", 512, scene);
probe.renderList.push(yellowSphere);
probe.renderList.push(greenSphere);
probe.renderList.push(blueSphere);
probe.renderList.push(mirror);
mainMaterial.refractionTexture = probe.cubeTexture;
See a demo here: https://www.babylonjs-playground.com/#22KZUW#3 -
But you can also use a RefractionTexture as source of refraction when you deal with a flat object. RefractionTexture works like mirror texture where you need to define a clip plane:
var refractionTexture = new BABYLON.RefractionTexture("th", 1024, scene);
refractionTexture.renderList.push(yellowSphere);
refractionTexture.renderList.push(greenSphere);
refractionTexture.renderList.push(ground);
refractionTexture.refractionPlane = new BABYLON.Plane(0, 0, -1, 0);
refractionTexture.depth = 2.0;
Depth parameter defines the depth value used to offset the refraction.
See a demo here: https://www.babylonjs-playground.com/#22KZUW#15 -
Index of refraction cab be controlled with material.indexOfRefraction (which is 1.05 by default).
You can see a live demo here: http://www.babylonjs.com/Demos/refraction
Multi Materials
Using a dedicated texture, multi materials can be assigned to one single mesh. It can be useful if you want your mesh to look different at different locations along its width, height, or depth. (such as a cutaway cross-section of the Earth's mantle).
Sometimes it is a bit difficult to determine which indices of a mesh should be textured by which of the multiple textures. David Catuhe has provided a comprehensive post about multi materials... on his blog: http://blogs.msdn.com/b/eternalcoding/archive/2013/07/10/babylon-js-using-multi-materials.aspx
You can view and play-with the demo used in this tutorial... right here -
.
You might also be interested in our Unleash the Standard Material tutorial, and our basic materials tutorial.