Materials
Introduction
Now that you can create different basic mesh elements anywhere in the scene, we are going to give those meshes some materials, to define how those mesh look.
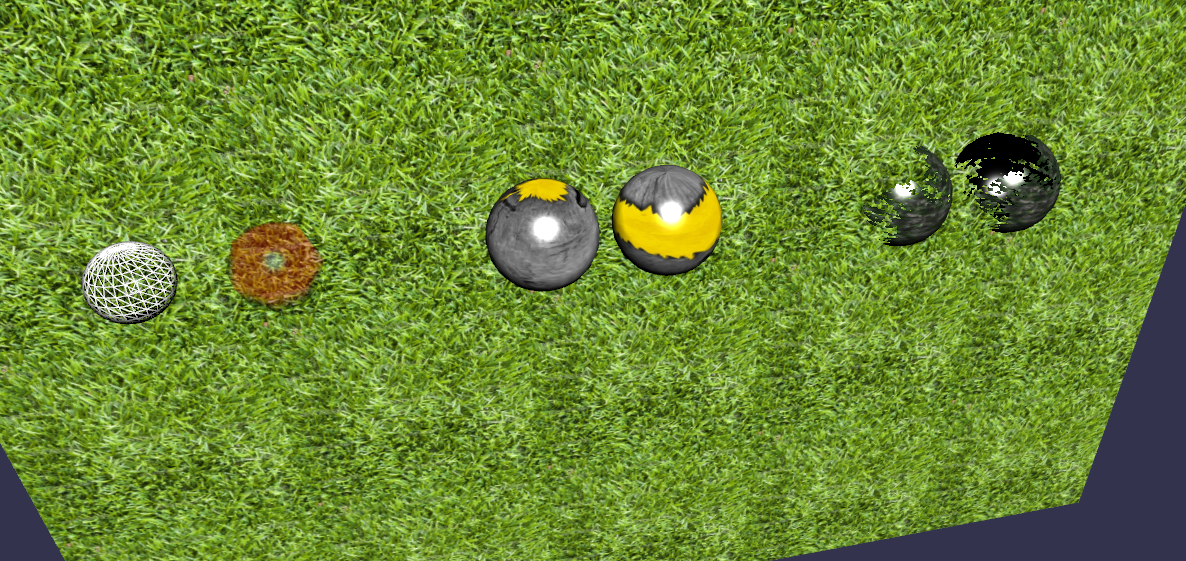
Playground Demo Scene 4 - Materials
How can I do this ?
We are so adept at making createScene functions that we can do it in our sleep, right? So let's get rolling with an omni-directional PointLight and an orbiting ArcRotateCamera. After that, we'll start making some basic mesh elements to test our materials upon.
function createScene() {
    var scene = new BABYLON.Scene(engine);
    var light = new BABYLON.PointLight("Omni", new BABYLON.Vector3(0, 100, 100), scene);
    var camera = new BABYLON.ArcRotateCamera("Camera", 0, 0.8, 100, BABYLON.Vector3.Zero(), scene);

    //Creation of spheres
    var sphere1 = BABYLON.Mesh.CreateSphere("Sphere1", 10.0, 6.0, scene);
    var sphere2 = BABYLON.Mesh.CreateSphere("Sphere2", 2.0, 7.0, scene);
    var sphere3 = BABYLON.Mesh.CreateSphere("Sphere3", 10.0, 8.0, scene);
[…]
    //Positioning the meshes
    sphere1.position.x = -40;
    sphere2.position.x = -30;
So far, you only have some grey-colored meshes. How drab! To apply a material to them, you will need to create a new material object like this:
var materialSphere1 = new BABYLON.StandardMaterial("texture1", scene);
And apply this material to the object of your choice, e.g.:
sphere1.material = materialSphere1;
Or, create and apply all in one step:
sphere1.material = new BABYLON.StandardMaterial("texture1", scene);
“I tested my scene, and …nothing changed…”
Exactly, because this material is the default one. You have to customize it as you like. You won’t change the mesh itself, but just the material.
“So how can I adjust my material to give the perfect look to my object?”
That is done by setting the properties on the material. Let's see what they are:
- Transparency (alpha channel)
Alpha compositing and transparency in general can be a bit complex. You might also want to read the wikipedia page about it. You will encounter even more uses for it when you enjoy the BabylonJS particle system, and BabylonJS sprites system.
Alpha transparency, written in percent (%), can be applied to a material in this way:
materialSphere1.alpha = 0.5;
- Diffuse
The diffuse is the native color of the object material once it is lit with a light. You can specify a solid color with the diffuseColor property:
materialSphere1.diffuseColor = new BABYLON.Color3(1.0, 0.2, 0.7);
Or, you can use a texture:
materialSphere1.diffuseTexture = new BABYLON.Texture("grass.png", scene);

More About Textures: Be sure to use the correct path to your image (relative or absolute path). Supported image formats include JPG, PNG, JPEG, BMP, GIF… (every image format supported by your browser).
If you want to translate (offset) your texture on your mesh, you can use the “uOffset” and “vOffset” properties:
materialSphere1.diffuseTexture.uOffset = 1.5;
materialSphere1.diffuseTexture.vOffset = 0.5;
And if you want to repeat/tile an image pattern (e.g. grass texture), you can use the “uScale” and “vScale” properties:
materialSphere1.diffuseTexture.uScale = 5.0;
materialSphere1.diffuseTexture.vScale = 5.0;
Remember that (u, v) coordinates refer to the following axis:

And if your texture has some alpha, you will need to specify it:
materialSphere1.diffuseTexture.hasAlpha = true;
In this case, alpha is used for alpha testing. But you may want to use it for alpha blending. To do so, just set materialSphere1.useAlphaFromDiffuseTexture
All of these texture settings apply to the other StandardMaterial properties as well. (.emissiveTexture, .ambientTexture, .specularTexture) I will remind you. Now let's continue talking about the other StandardMaterial properties.
- Emissive
The emissive is the color produced by the object itself. You can specify a solid color with the emissiveColor property:
materialSphere1.emissiveColor = new BABYLON.Color3(1, .2, .7);
Or, you can use a texture:
materialSphere1.emissiveTexture = new BABYLON.Texture("grass.png", scene);
See the More About Textures section above. Change occurrences of 'diffuse' to 'emissive', of course.
- Ambient
The ambient can be seen as a second level of diffuse. The produced color is multiplied to the diffuse color. This is especially useful if you want to use light maps baked into textures. You can specify a solid color with the ambientColor property:
materialSphere1.ambientColor = new BABYLON.Color3(1, 0.2, 0.7);
Or, you can use a texture:
materialSphere1.ambientTexture = new BABYLON.Texture("grass.png", scene);
See the More About Textures section above. Change occurrences of 'diffuse' to 'ambient', of course.
- Specular
The specular is the color produced by a light reflecting from a surface. You can specify a solid color with the specularColor property:
materialSphere1.specularColor = new BABYLON.Color3(1.0, 0.2, 0.7);
Or, you can use a texture:
materialSphere1.specularTexture = new BABYLON.Texture("grass.png", scene);
When using a texture you can set materialSphere1.useGlossinessFromSpecularMapAlpha to true to use specular map alpha as glossiness level.
You can also control how specular behaves with alpha. By default, specular does not interact with alpha, but you can set materialSphere1.useSpecularOverAlpha to true to have alpha inversely proportional to specular value.
Again, see the More About Textures section far above. Change occurrences of 'diffuse' to 'specular', of course.
The specular property has one more setting. The size/intensity of the specular reflection can be set using the specularPower property:
materialSphere1.specularPower = 32;
Section on OpacityTexture needed here, coming soon.
There, we have visited the primary color and texture properties of StandardMaterial. But we are not done yet. Here are a few more handy properties.
- Back-Face Culling
Simply put, “back-face culling” determines whether or not a StandardMaterial is visible from its back side (from behind). TRUE = NOT visible. More precisely, this rendering-speed-optimization technique determines if a polygon of a graphical object is visible or not. If set to TRUE or boolean 1, the Babylon engine won’t render hidden face(s) of the meshes that use this material. It is set TRUE by default, but can be changed to false as wanted. You may want to read more about back-face culling at the wikipedia page about it.
In this example, the texture has some alpha, and back-face culling is set to false for the front sphere... in order to see its black inside face:

materialSphere1.backFaceCulling = false;
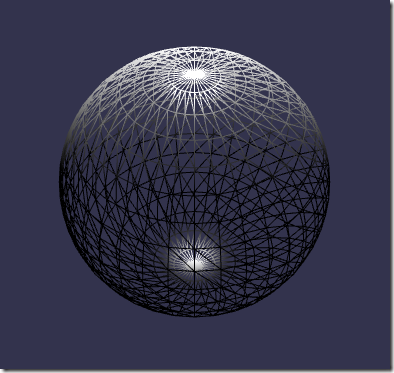
- WireFrame
You can see your object in wireframe mode... by using:
materialSphere1.wireframe = true;
Again, you can see things from this tutorial... come to life... by browsing to the Babylon.js Playground scene 4.
More information about materials can be found by reading Unleash the StandardMaterial and also Advanced Texturing.
Textures Available to Playground
The following images are available to use as textures or heightmaps in the playground using
new BABYLON.Texture("textures/name", scene);
albedo.png
amiga.jpg
bloc.jpg
candleopacity.png
cloud.png
co.png
crate.png
distortion.png
earth.jpg
equirectangular.jpg
fire.png
flare.png
floor.png
floor_bump.PNG
fur.jpg
grass.jpg
grass.png
grassn.png
ground.jpg
heightMap.png
heightMapTriPlanar.png
impact.png
invmask.png
Logo.png
mask.png
misc.jpg
mixMap.png
normalMap.jpg
orient.jpg
palm.png
player.png
reflectivity.png
rock.png
rockn.png
roundMask.png
sand.png
specmap.png
specularglossymap.png
sphereMap.png
sun.png
SunDiffuse.png
tree.png
walk.png
waterbump.png
worldHeightMap.jpg
xStrip.jpg
yStrip.jpg
zStrip.jpg
CubeMap Groups Available to Playground
The following groups of images are available to use as skyboxes in the playground using
new BABYLON.CubeTexture("textures/common part of names", scene);
skybox_nx.jpg
skybox_ny.jpg
skybox_nx.jpg
skybox_px.jpg
skybox_py.jpg
skybox_pz.jpg
skybox2_nx.jpg
skybox2_ny.jpg
skybox2_nx.jpg
skybox2_px.jpg
skybox2_py.jpg
skybox2_pz.jpg
skybox3_nx.jpg
skybox3_ny.jpg
skybox3_nx.jpg
skybox3_px.jpg
skybox3_py.jpg
skybox3_pz.jpg
skybox4_nx.jpg
skybox4_ny.jpg
skybox4_nx.jpg
skybox4_px.jpg
skybox4_py.jpg
skybox4_pz.jpg
TropicalSunnyDay_nx.jpg
TropicalSunnyDay_ny.jpg
TropicalSunnyDay_nx.jpg
TropicalSunnyDay_px.jpg
TropicalSunnyDay_py.jpg
TropicalSunnyDay_pz.jpg
HDR CubeMaps Available to Playground
The following images are available to use as textures or heightmaps in the playground using
new BABYLON.HDRCubeTexture("textures/name", scene);
country.hdr
environment.babylon.hdr
forest.hdr
night.hdr
parking.hdr
room.hdr
Environment textures
The following images are available to use as environment texture using
BABYLON.CubeTexture.CreateFromPrefilteredData("/textures/environment.dds", scene);
- environment.dds
Other Files Available to Playground in "textures" Directory
babylonjs.mp4
big_buck_bunny.mp4
babylonjs.webm
HorrorBlue.3dl
LateSunset.3dl
Next step
Great, your scene is looking better than ever with those materials! Later we will see how to use advanced techniques with materials. But for now, we have to learn how to use cameras.