Using the Materials Builder (for developers)
Using the Materials Builder
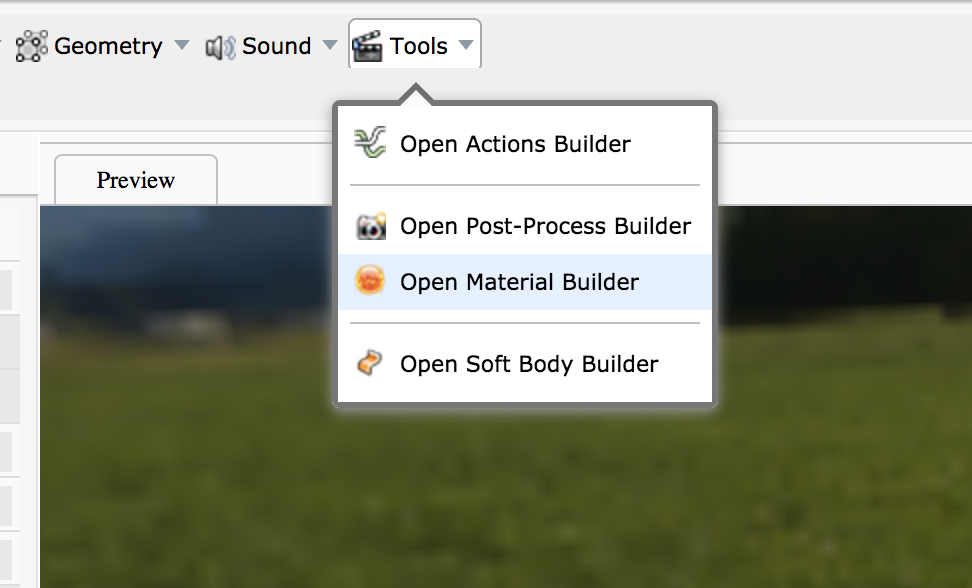
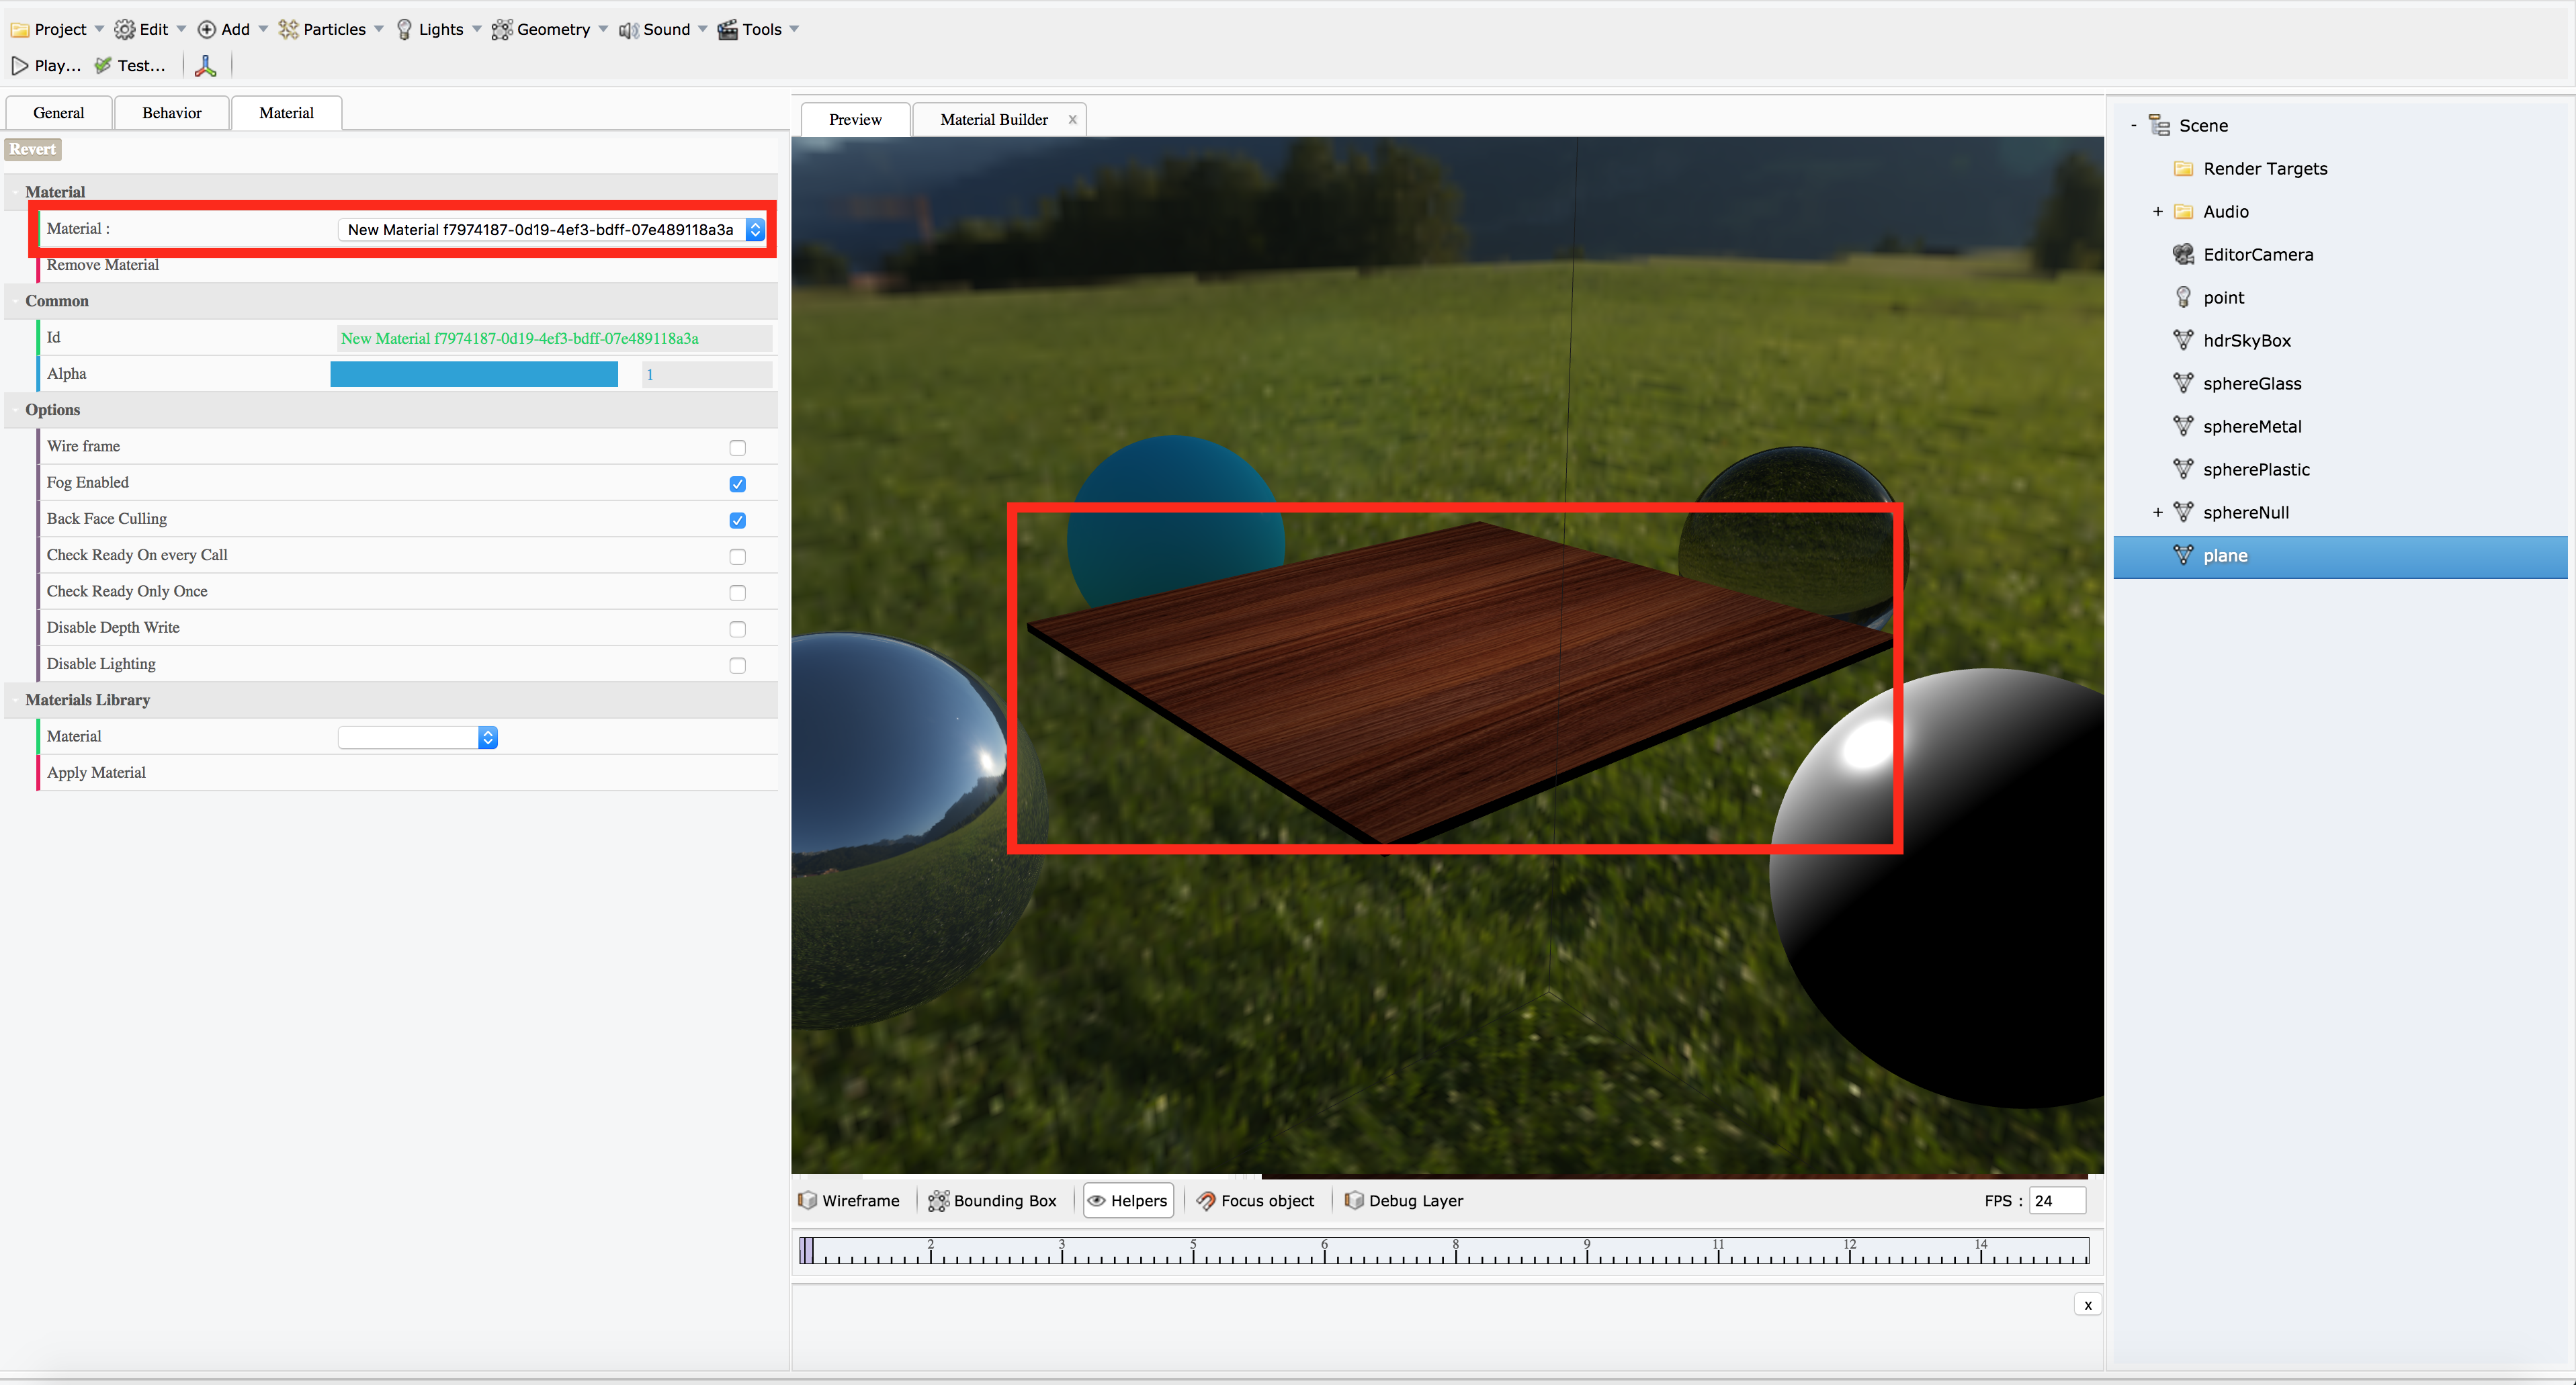
Opening the Materials Builder
As for the Post-Processes Builder, you are able to develop custom materials using a JSON configuration. Just select it in the main tool bar.
Features available:
- Develop GLSL code directly in the Editor (vertex and pixel)
- Manage custom uniforms (float, Vector2, Vector3, Vector4)
- Manage custom samplers (textures)
Adding a new material
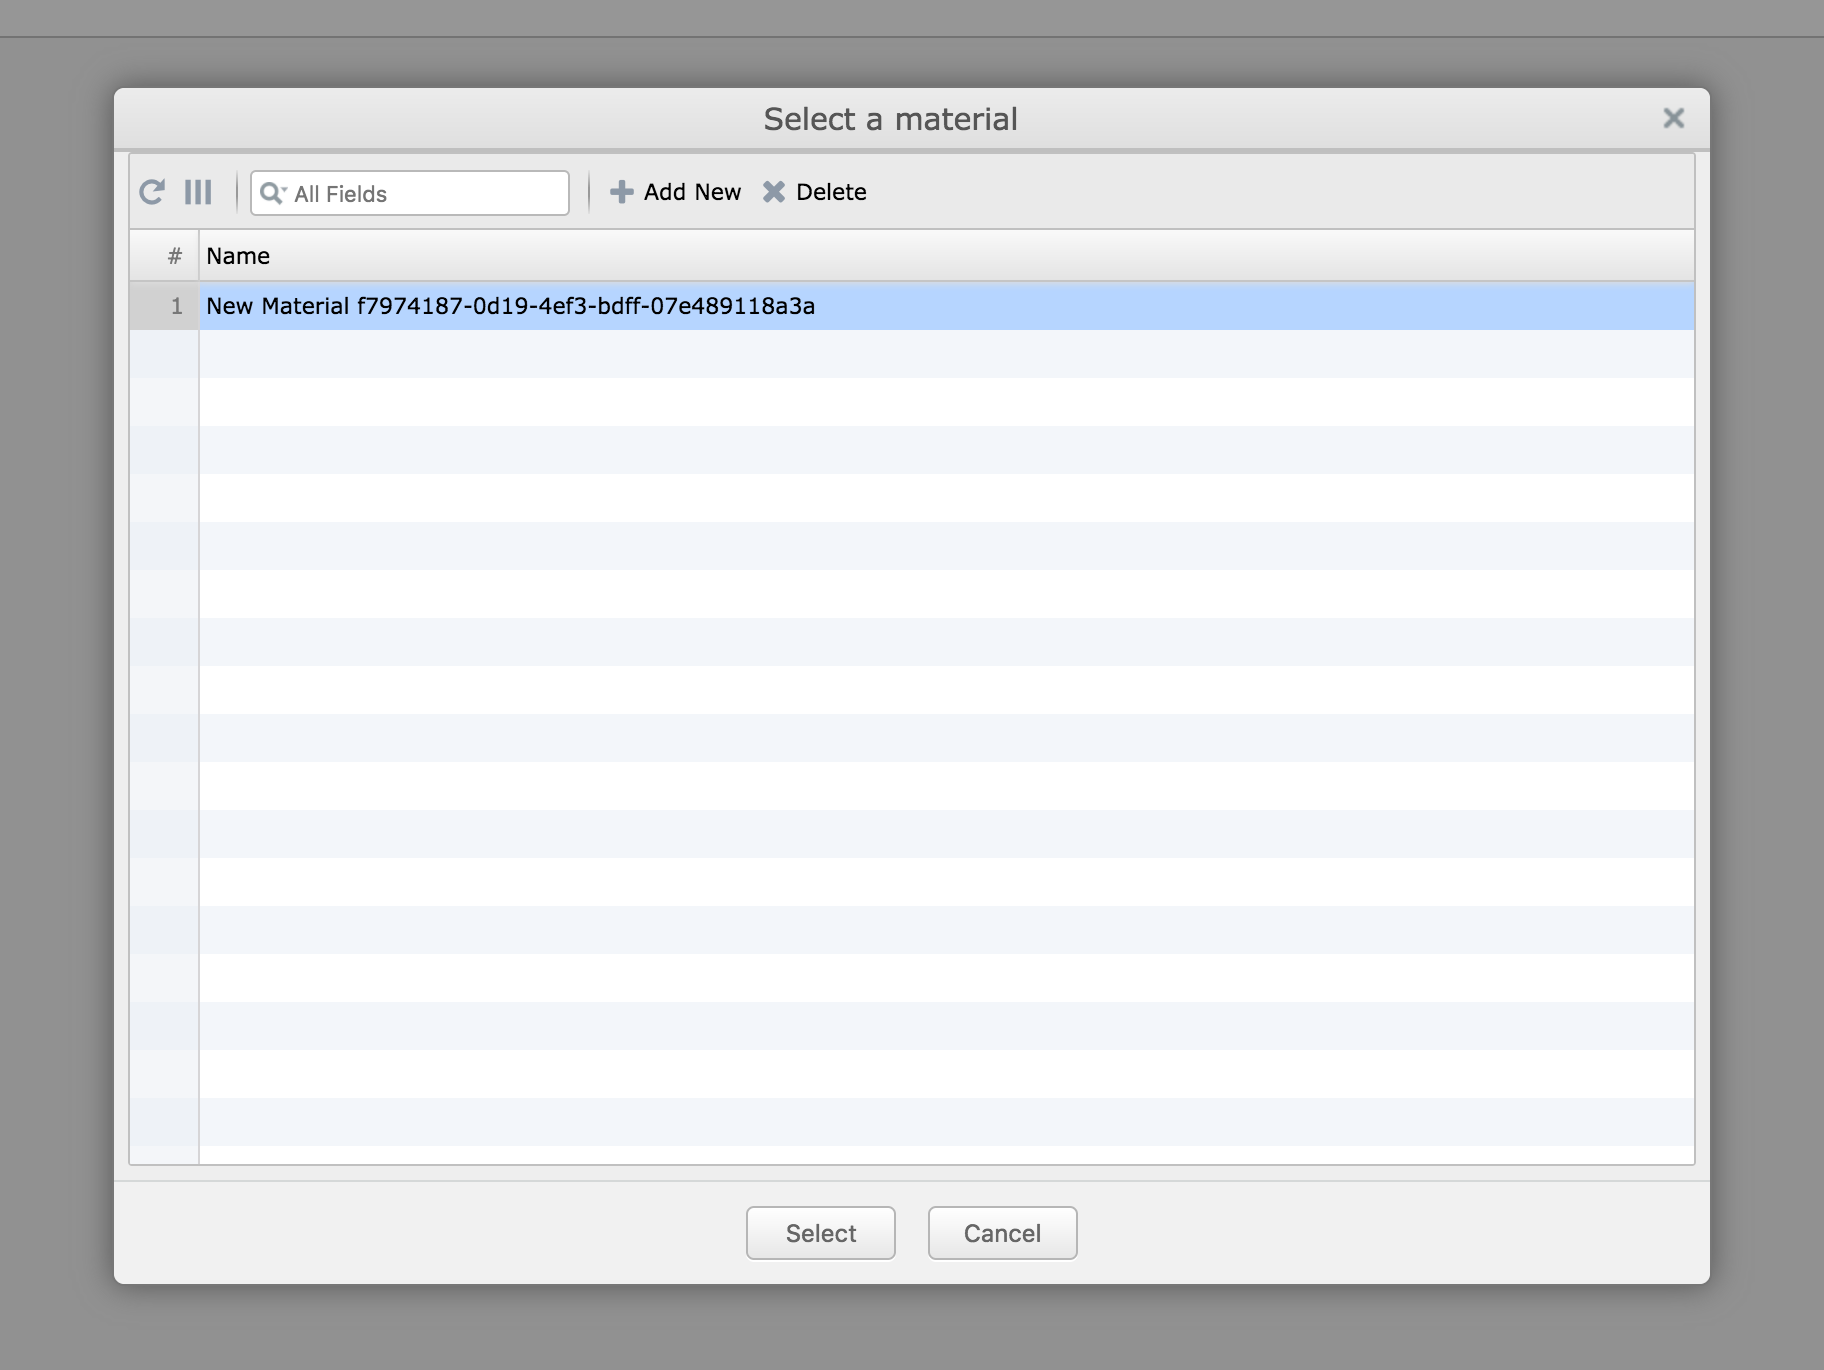
Before opening the Materials Builder, you can add a new material or select an existing one in order to edit it. To add a new material, just click "Add New: then, a new material with default vertex, pixel and configuration files is created.
To edit a material, just select one and click the button "Select"
Using the Materials Builder
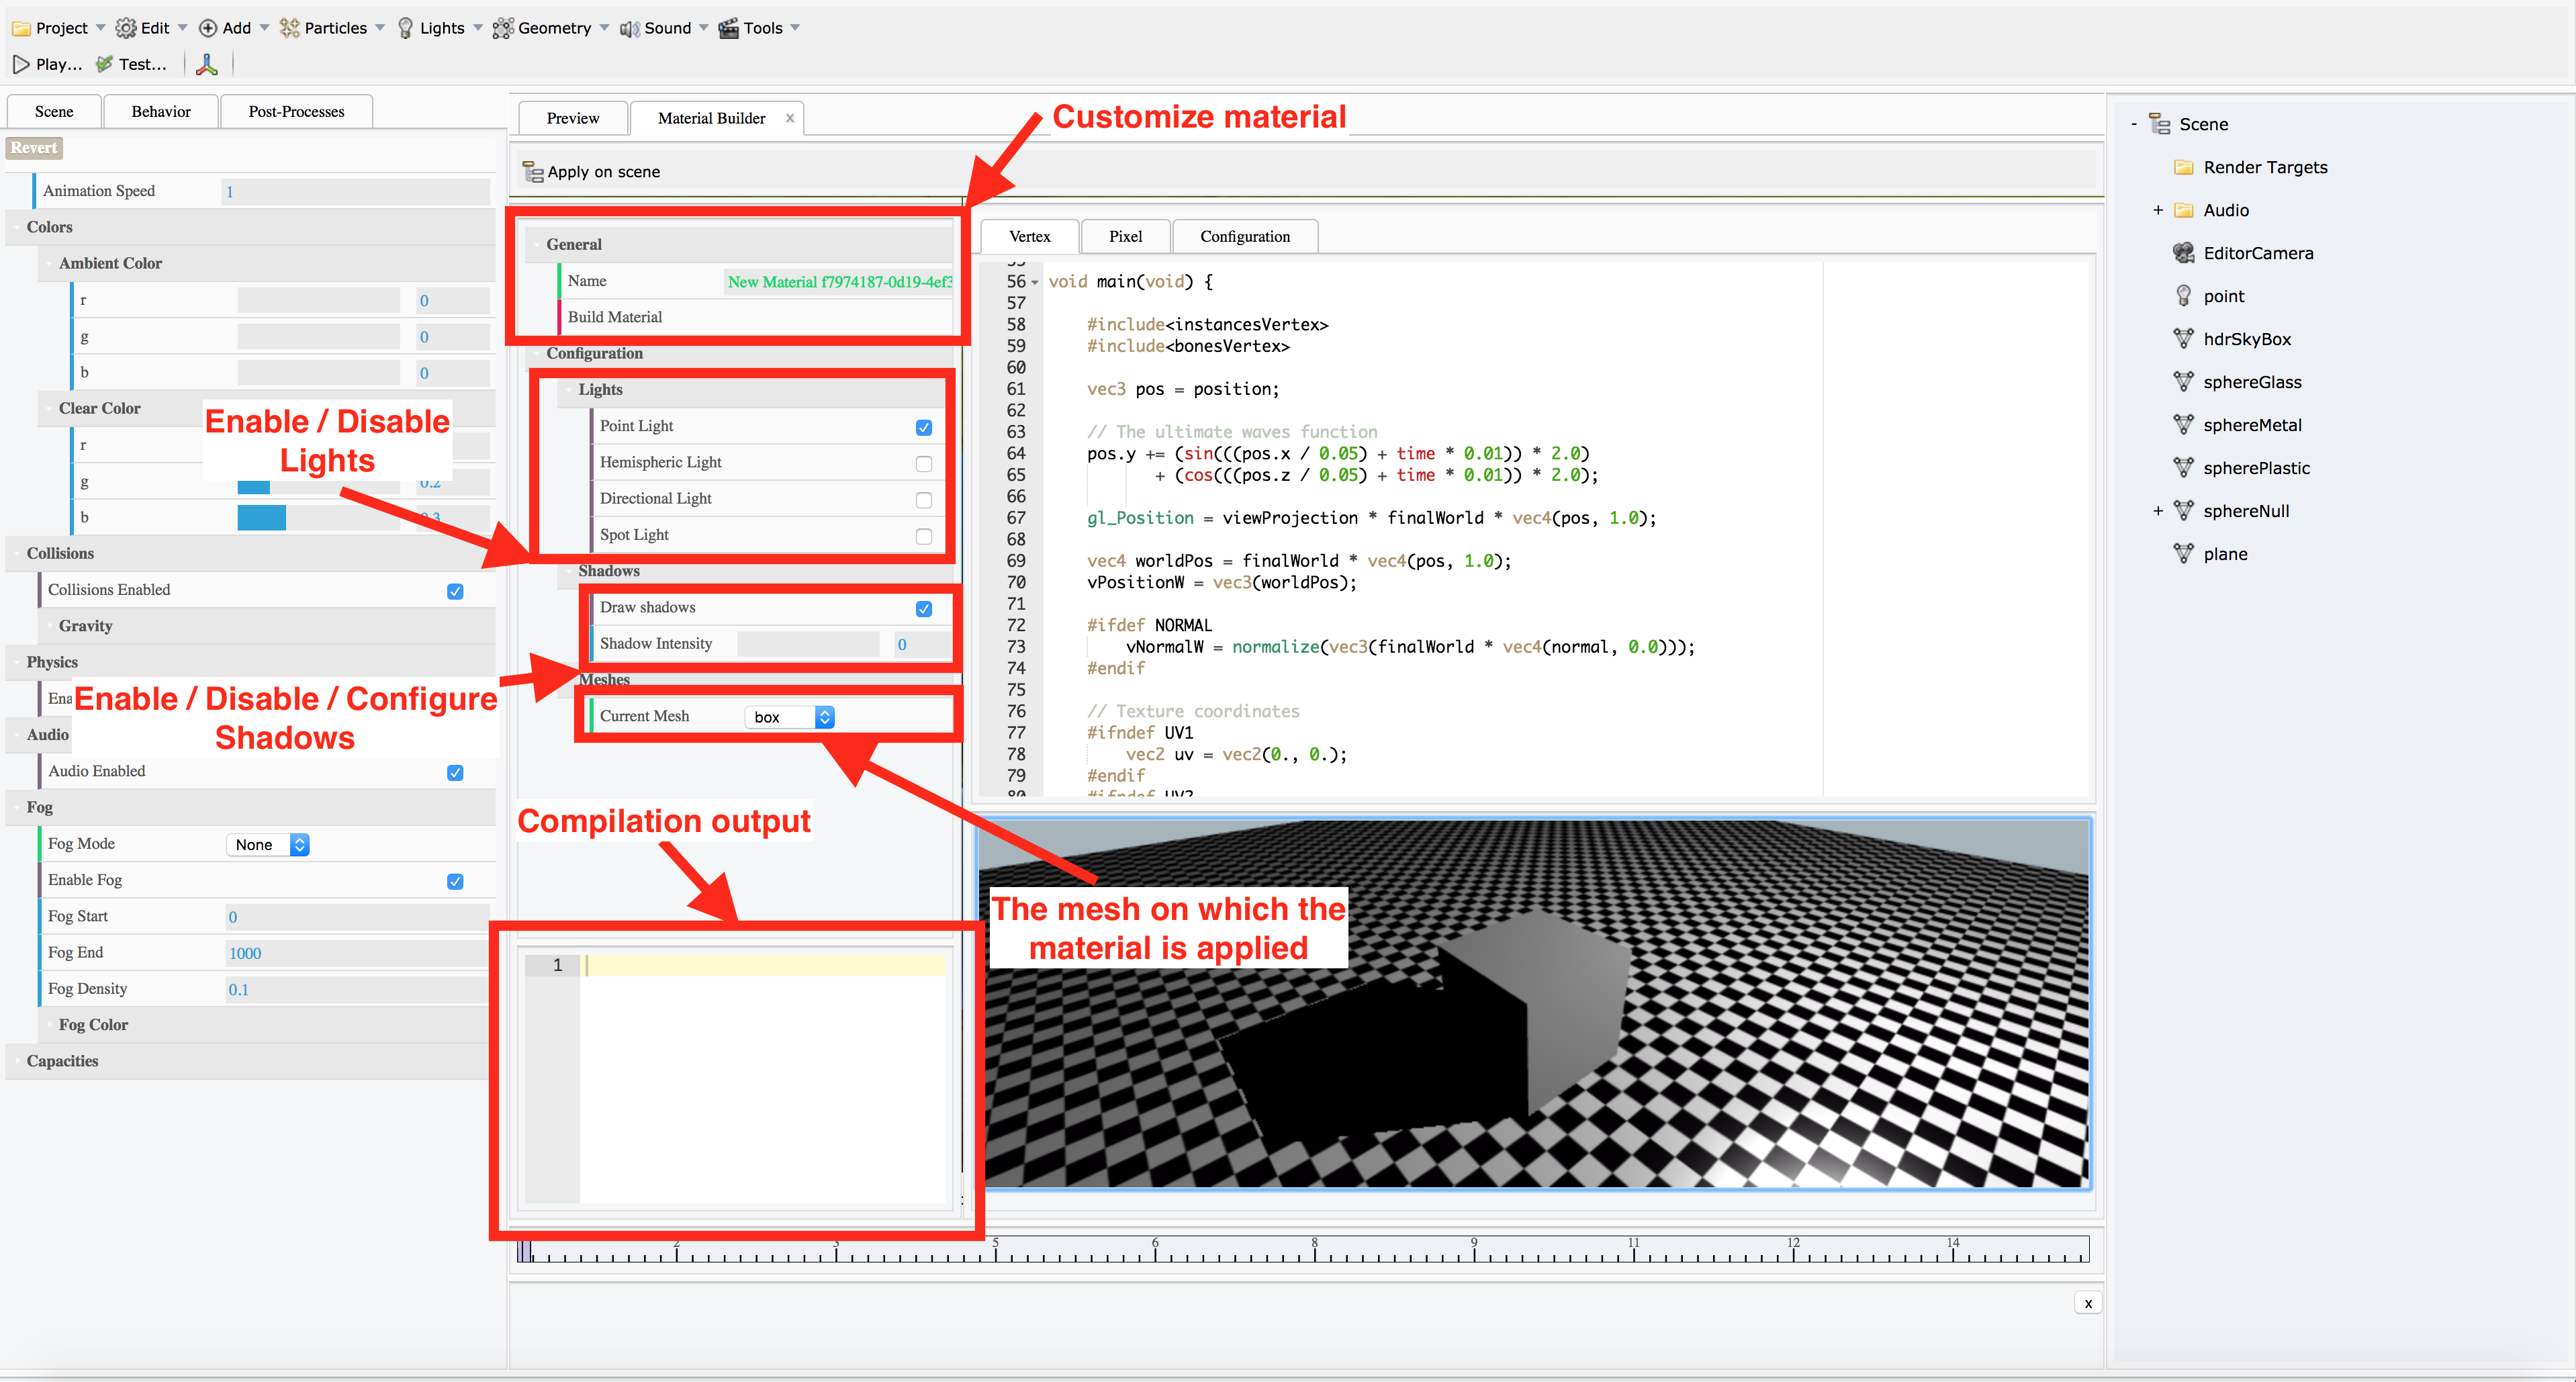
Once opened, you are now able to configure the uniforms & samplers, and edit the vertex & pixel shaders code.
On the left, you have an edition tool which allows you to configure the material:
- The material's name
- Build the material
And the preview scene:
- Enable / disable shadows
- Enable / disable lights (to test if all light types are supported by your shader)
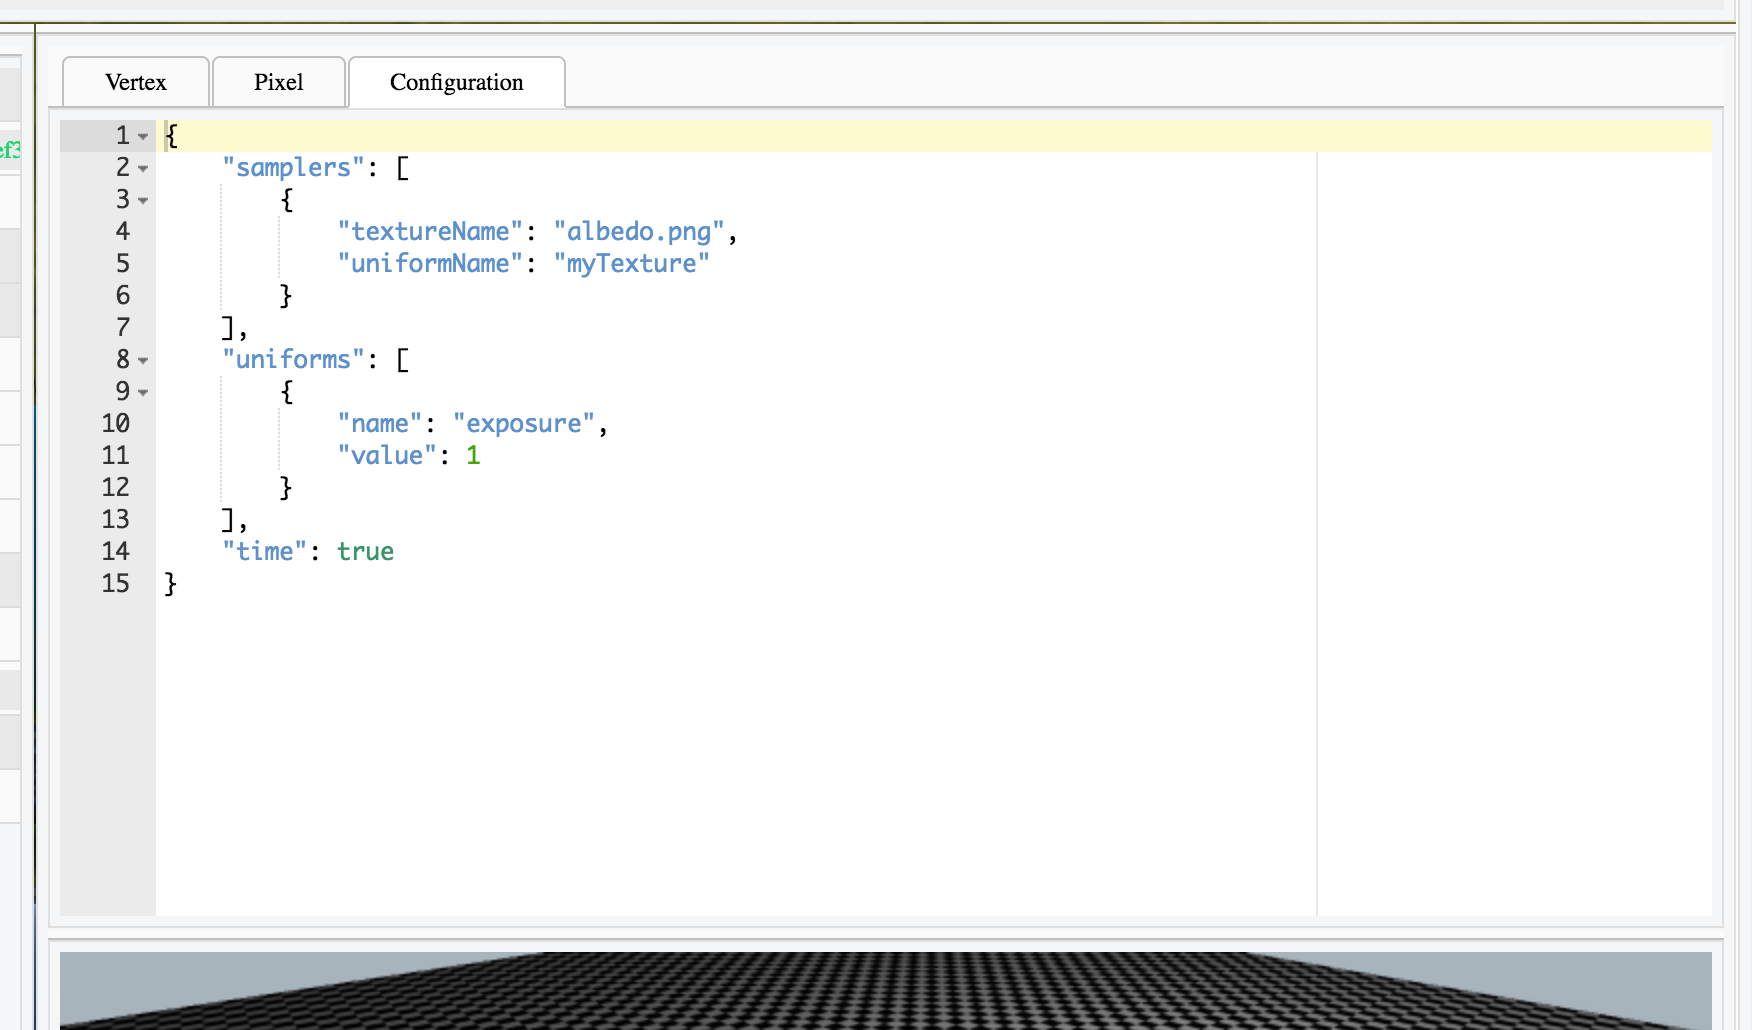
The configuration
The configuration tab allows you to declare custom uniforms and samplers. In the default material all available options, like "time", are used as example (here, time is used by waves function in default vertex shader).
For samplers, the parameter "uniformName" is important: the name is used to declare the texture matrix and texture infos in the vertex shader.
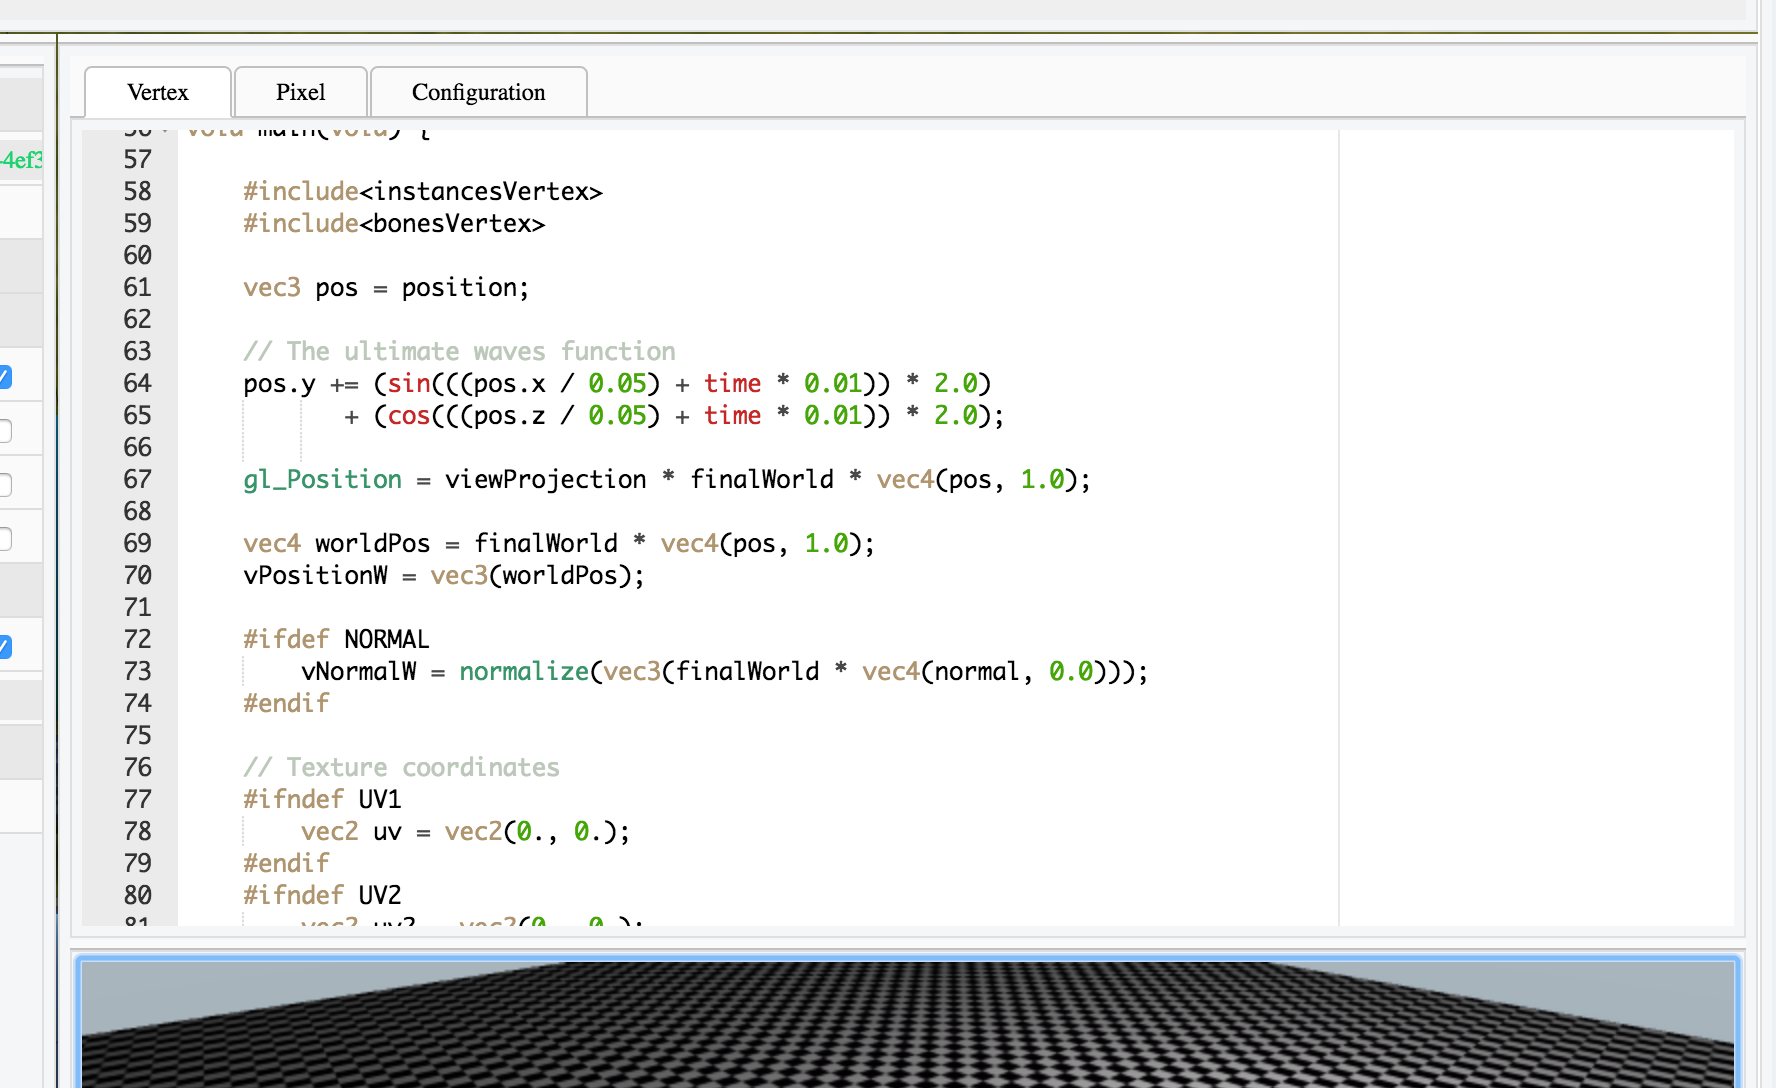
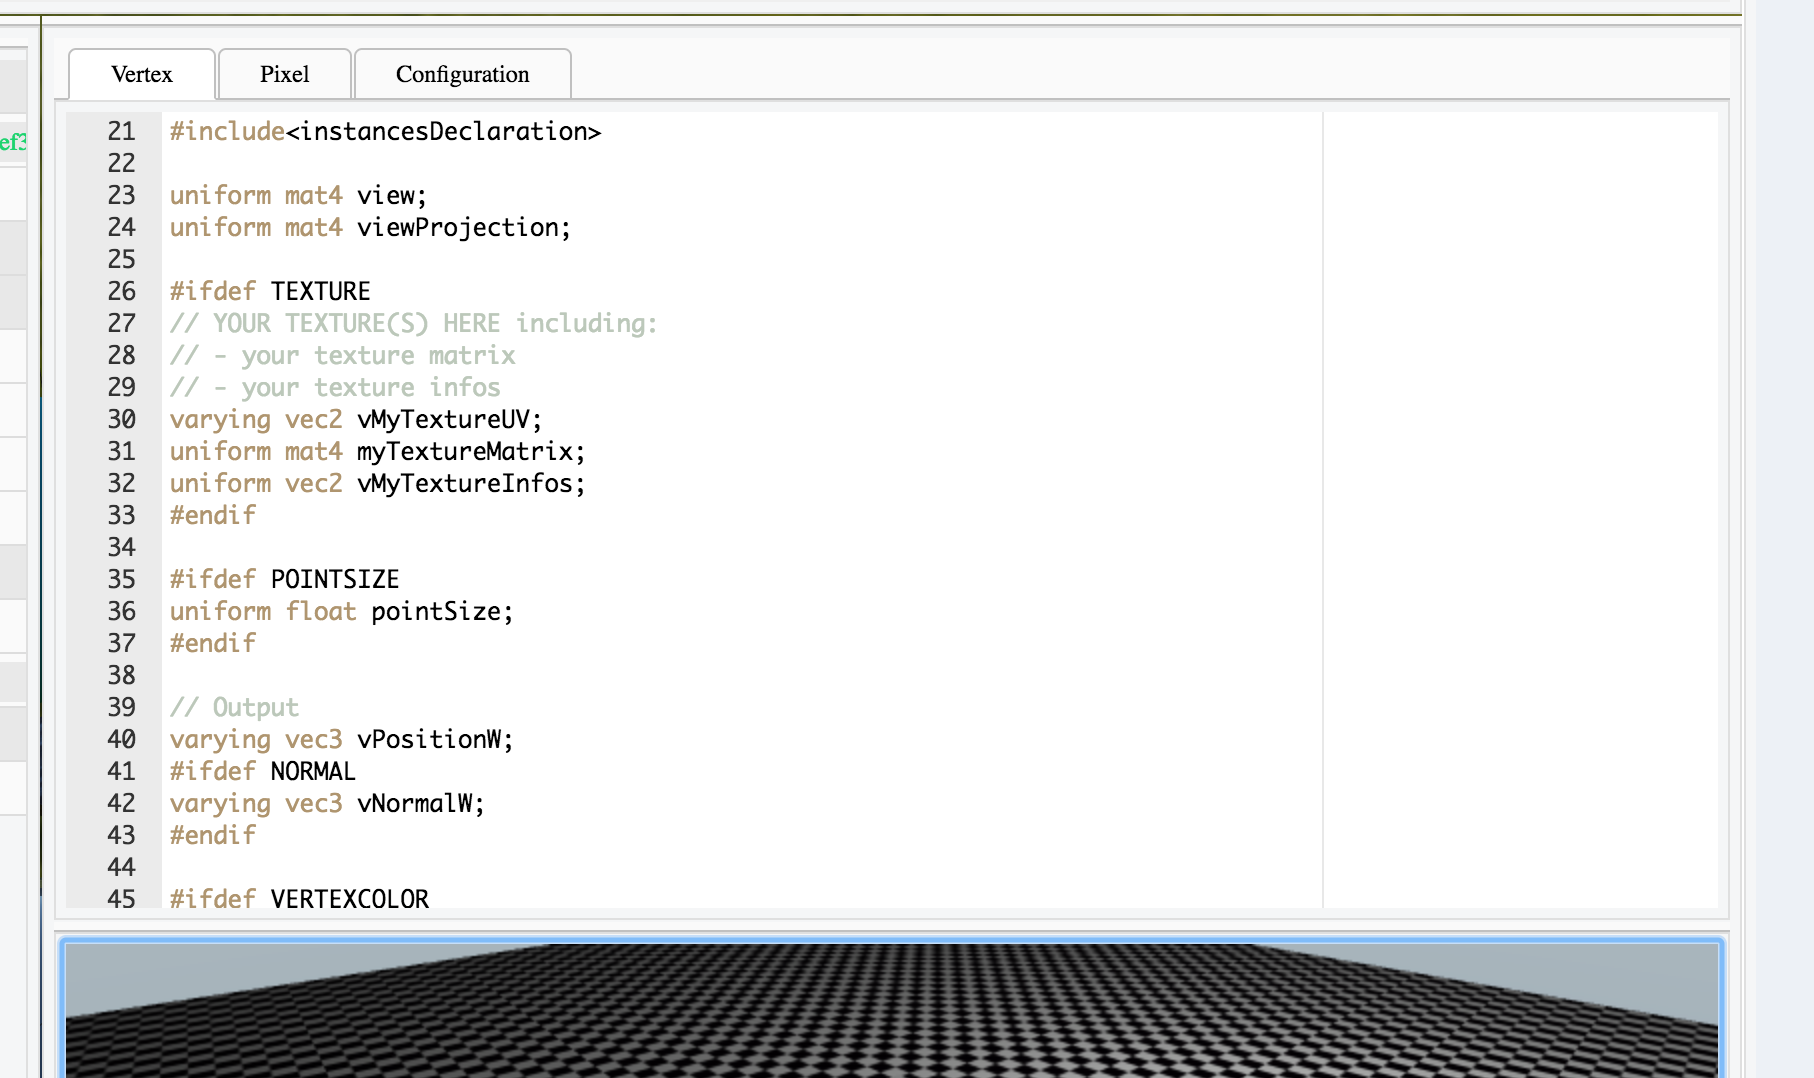
The vertex shader
The vertex and pixel shaders follow the way to create materials with Babylon.js. A lot of code is already written then you only have to include files (#include). All default "includes" are already implemented in default material. In the default material, a custom waves function is available as an example line 64
On line 26, the uniforms related to the sampler named "myTexture" (in samplers configuration) are available as example. The uniforms "myTextureMatrix" and "vMyTextureInfos" are sent automatically by the engine following the name you set in configuration: here "myTexture".
Free to you to use it in your vertex shader :)
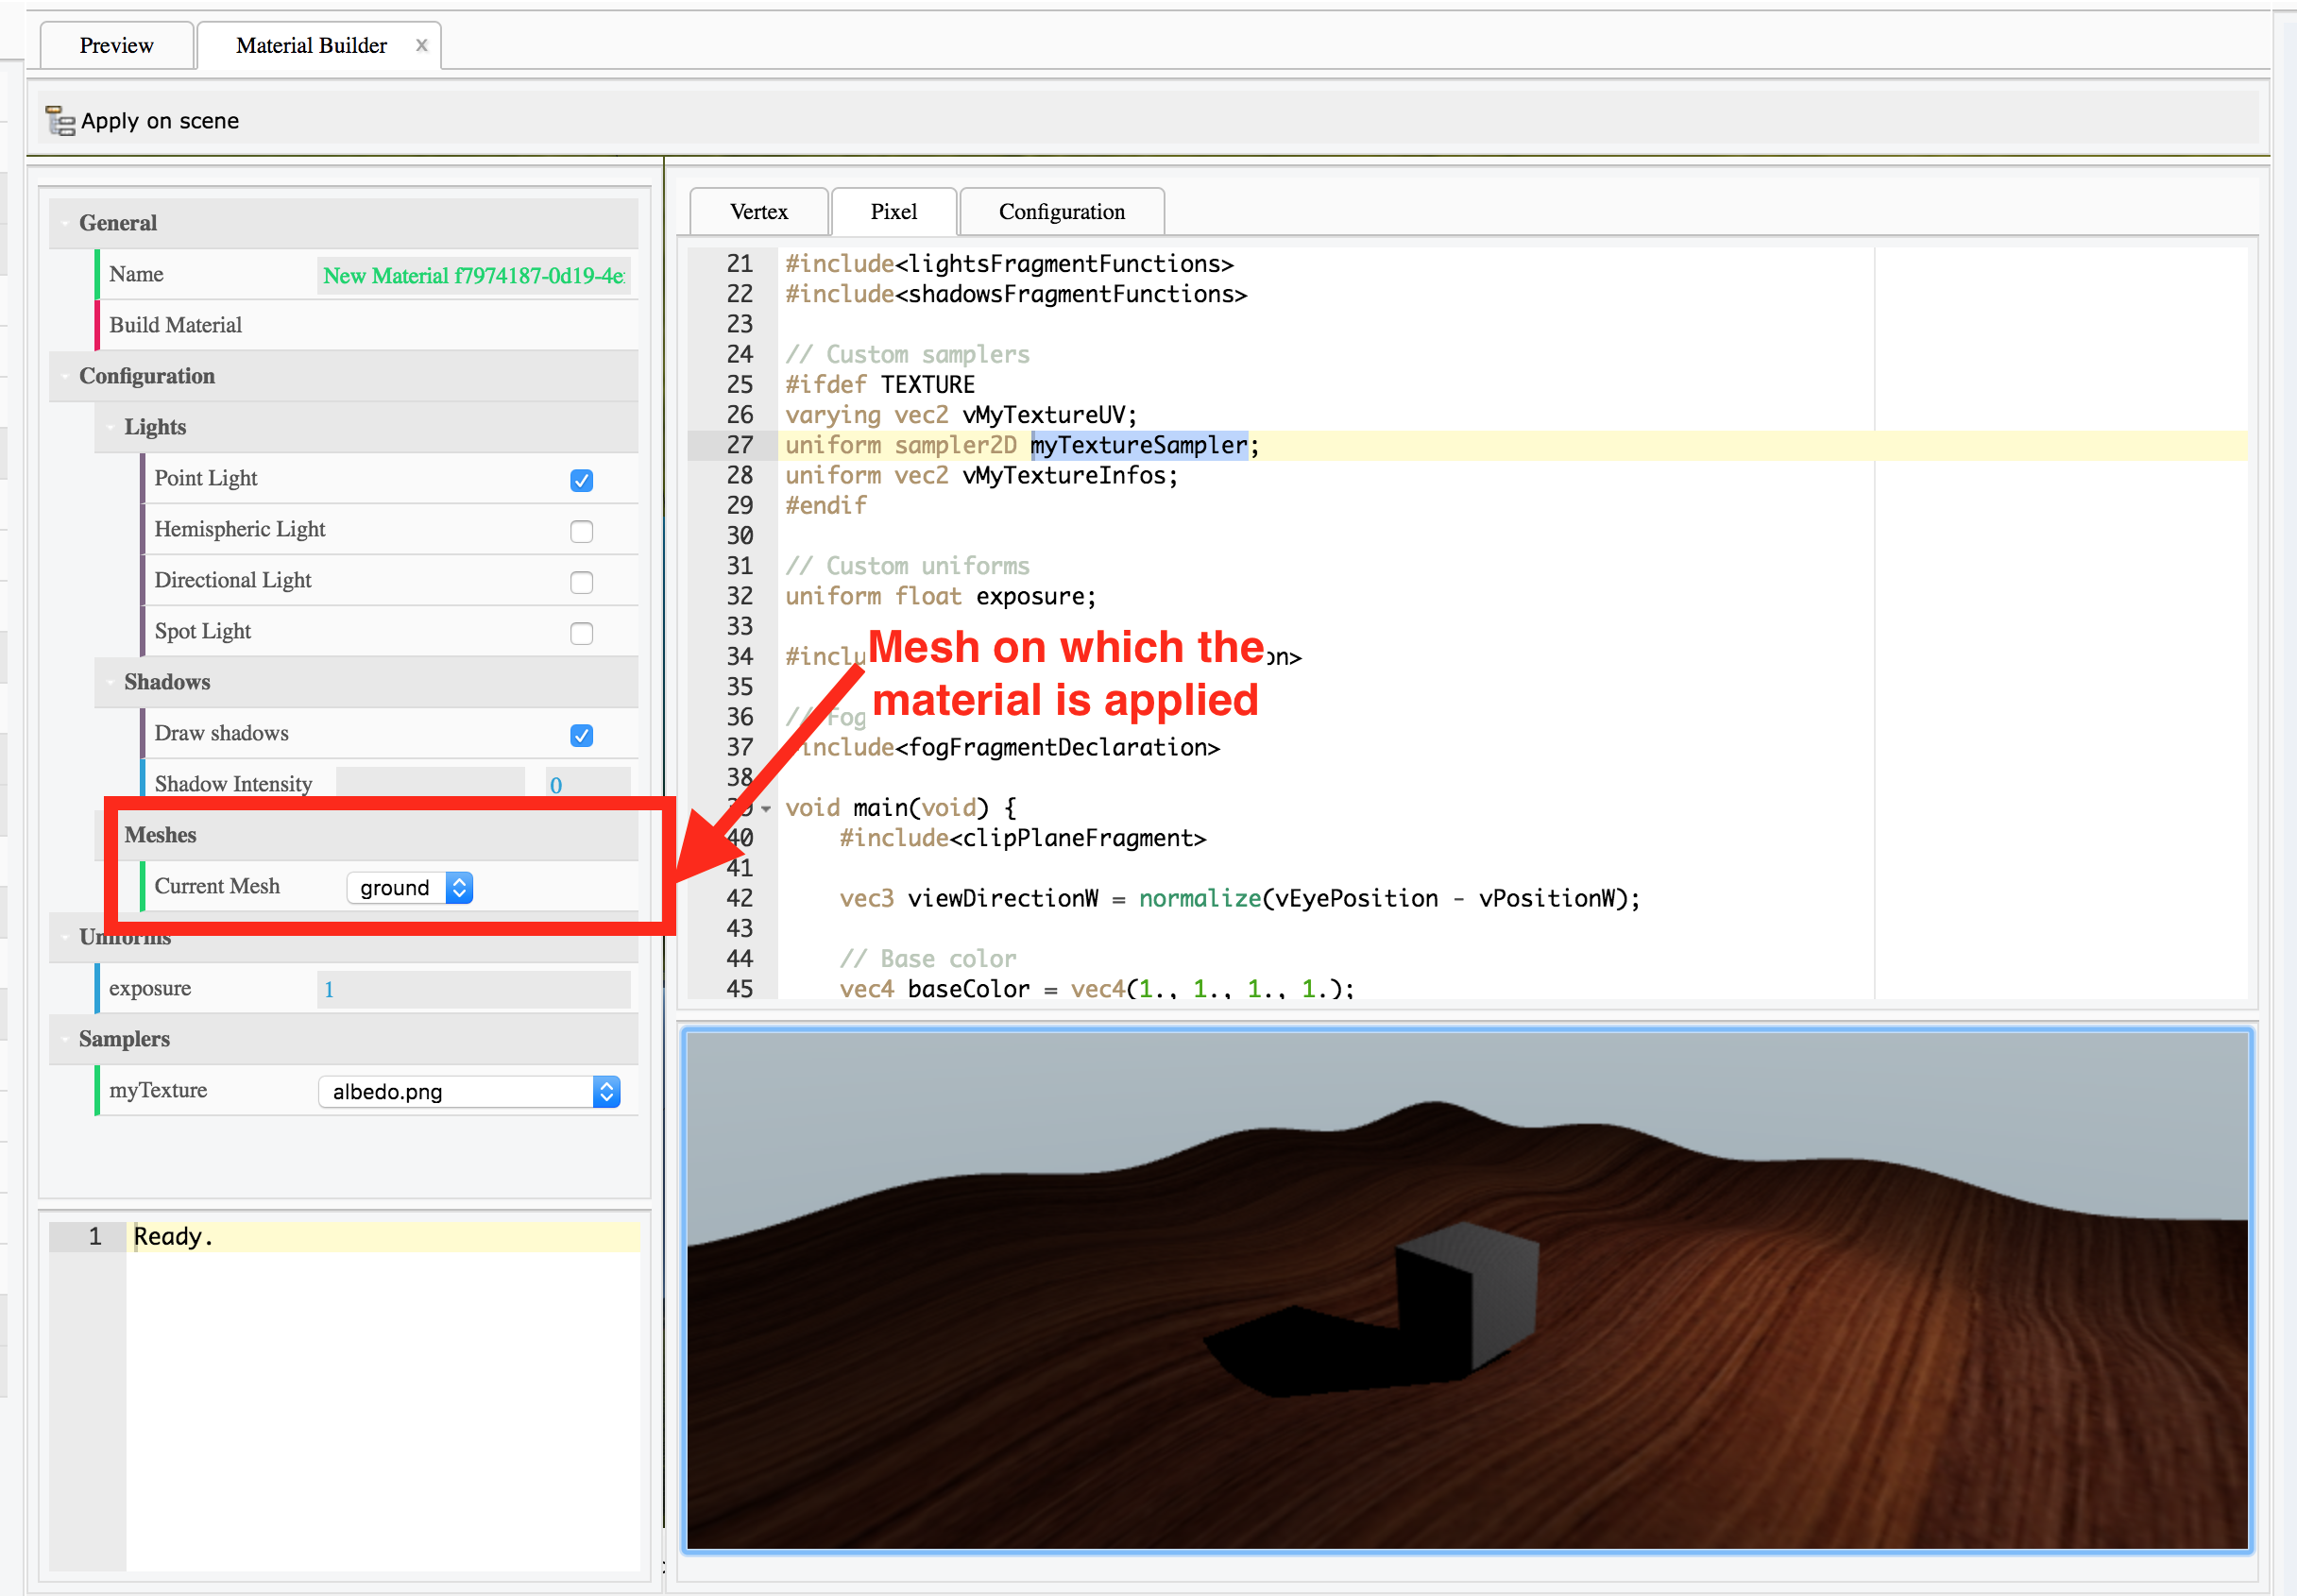
The pixel shader
As for vertex shader, the uniforms "vMyTextureInfos" and "myTextureSampler" are set automatically by the engine. Free to you to use it in the pixel shader
![]()
Building the material
In order to preview the material in the preview scene, just click the button "Build Material" in the edition tool (on the left). Then, the material is applied on the mesh you specified in the edition tool (default "Box").
Once built, new fields are created in edition tool:
- Uniforms
- Samplers
These fields are used to realtime customize your material in order to get your configuration perfect.
Applying your new material on a mesh
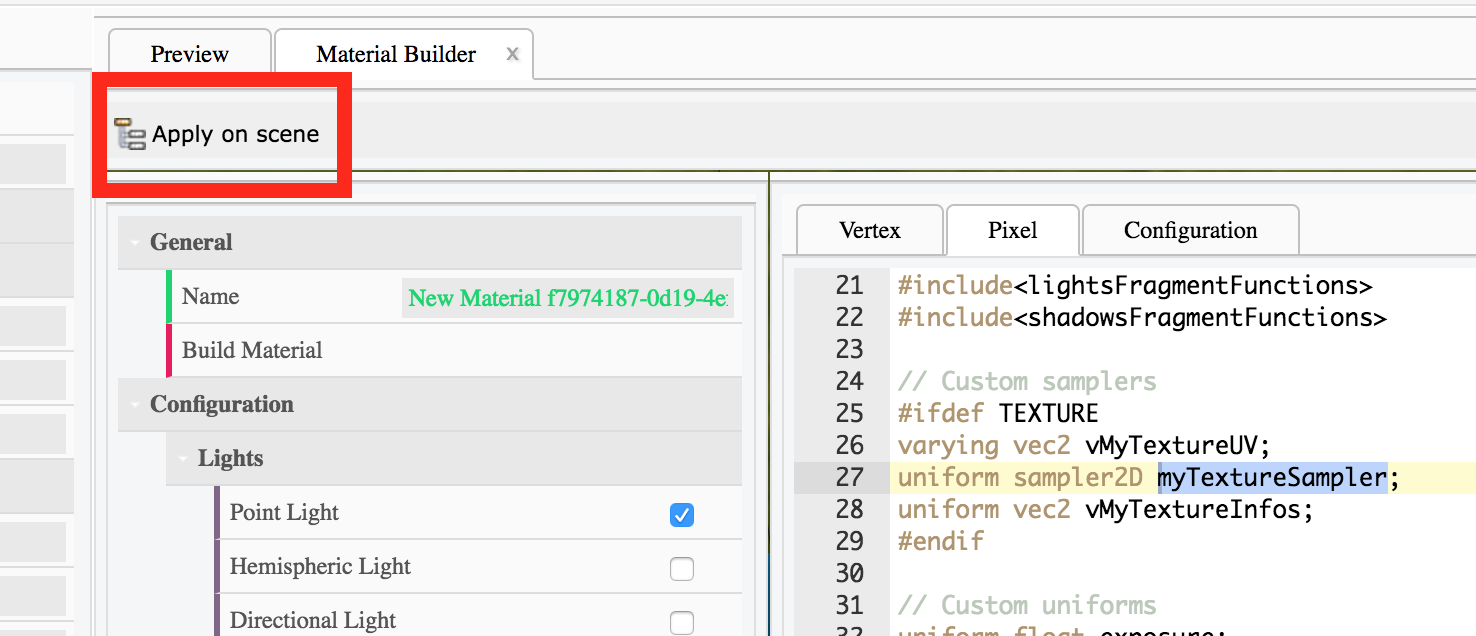
Once built, you can apply your material in the main scene of your project. Then, apply the material on one/multiple meshes. Just click "Apply on scene".
Then, select a mesh in your scene and set the material you created :)
Known limitations
- Once the material is built, only 2D textures preview are supported in "Samplers" menu, in edition tool