How to start contributing to Babylon.js
How to start
Introduction
Development Ecosystem in Web is becoming more and more difficult to chose due to the diversity of tools and Frameworks. If you want to get started on BJS, we chose to support a set of tools to simplify your first steps with it. This can also be use on a daily basis for your contribution development.
This document will introduce everything from the tools installation to debugging in BJS. Thid is meant to be OS agnostic to allow developping the same way on Windows, Mac and Linux.
Pre-Requisite
Git Client
If you do not already have a git client, you can install one from Git.
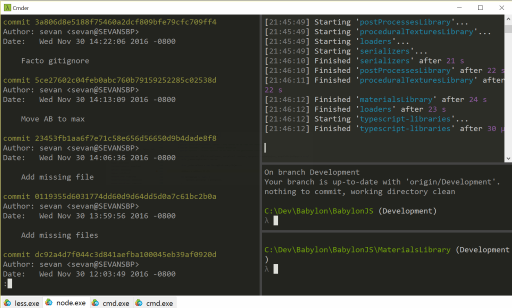
Hint: if you are developping on Windows, I would recommand using cmder as your command line host (the full install is worth it and embed a git client).
Once done, you can open a command line and configure git globally:
git config --global user.name "John Doe"
git config --global user.email johndoe@example.com
NodeJS and NPM
The second step is to install nodejs and its package manager. This will be your best friends and the platform helping achieving a X-platform dev experience: https://nodejs.org/en/.
Typescript and Gulp
Once both git and npm are installed in your environment, please install in global the both major BJS dev dependencies by launching those command lines:
- npm install -g typescript
- npm install -g gulp
They are respectively for dealing with the Typescript language and the build tools used in the project.
Hint: if you are developping on Windows, I would recommand using cmder as your command line host (the full install is worth it).
Visual Studio Code
Trying to be Opens source and OS agnostic, we chose to support VSCode which offer the quickest approach to get started. For the ones amongst you with already another choice, it is worth giving it a try and see what it brings as the heavy integration has been managed for you.
You can install VSCode from their site: https://code.visualstudio.com/
Once install, a few pluggins will help you having the best experience. You can search for them in the extension tab (Ctrl+Shift+d):
- Debugger for Chrome (also installing chrome will help but I guess this is already done)
- Shader language support for VS Code (syntax highlighting ang autocompletion in glsl shader)
- This extension can be used to display the content of a babylon file directly in vscode. It can be useful if you want to quickly check if your artist made a good job with object and their names :)
Finally, I would recommand adding a few shortcuts to your environment. Follow the guide:
- To configure keyboard shortcuts the way you want, go to the menu under File > Preferences > Keyboard Shortcuts. (Code > Preferences > Keyboard Shortcuts on Mac)
- In the left side, add:
// Place your key bindings in this file to overwrite the defaults
[
{ "key": "ctrl+shift+alt+s",         "command": "workbench.action.files.saveFiles" },
{ "key": "ctrl+shift+alt+k",         "command": "workbench.action.tasks.terminate" },
{ "key": "ctrl+shift+alt+t",         "command": "workbench.action.tasks.test" },
{ "key": "ctrl+shift+alt+l",         "command": "workbench.action.tasks.showLog" },
{ "key": "ctrl+shift+alt+r",         "command": "workbench.action.tasks.runTask" }
]
This will make the main commands quicker to access. Do not hesitate to adapt the bindings to your Preferences.

Installation
You are now all setup, and only a few steps from debugging. You now need to clone the project from github. Open a command line, move to the folder that will contain bjs and type:
git clone https://github.com/BabylonJS/Babylon.js.git
You could clone your own fork of babylon in the same way by using its own git repository url:
git clone {yourrepo}
git remote add upstream https://github.com/BabylonJS/Babylon.js.git
Adding the upstream will help syncing back your fork.
Then navigate to the BJS folder and install the BJS required node modules through npm:
cd BabylonJS/Tools/Gulp
npm install
You are good to go !!!
Debug
Open VSCode on the newly created BabylonJS folder and launch the test task. To do so, 3 solutions:
- Use the shortcut to run a task (Ctrl+Shift+p) and begin to type test. You should be on run test task, so hit enter.
- Use the shortcut you previously bind to the command in your keyboard bindings (default is Ctrl+Alf+Shift+t)
- Open a terminal on Tools/Gulp and run
gulp run
This has been hijacked for your convenience and will watch all the files you are modifying as well as web serve the files for development purpose. As you noticed in the VSCode installation you can easily hook it to a keyboard shortcut.
Once the task is launched you can kill it by repsectively:
- Use the shortcut to run a task (Ctrl+Shift+p) and begin to type terminate. You should be on Terminate Running Task task, so hit enter.
- Use the shortcut you previously bind to the command in your keyboard bindings (default is Ctrl+Alf+Shift+k)
- In the terminal press
Ctrl+c
In the VSCode debug tab, chose the section you want to debug and launch the debugger (the test task needs to be running).
This will debug alls the TS and js in chrome and stop on your breakpoints setup in those files in VSCode. This debugs all the code from src, materialsLibrary, procceduralTexturesLibrary, postprocessLibrary...
Hint: If another chrome sesssion already runs in remote debug on port 9222 the debugger will fail to attach as the port is already open. You will have to close the other remote debug first.
The main entry points in BJS are:
- Sandbox: http://localhost:1338/sandbox/index-local.html
- Playground: http://localhost:1338/Playground/index-local.html
- Materials Library: http://localhost:1338/materialsLibrary/index.html
- Post Process Library: http://localhost:1338/postProcessLibrary/index.html
- Procedural Textures Library: http://localhost:1338/proceduralTexturesLibrary/index.html
- Inspector: http://localhost:1338/inspector/index.html
- Local Dev: http://localhost:1338/localDev/index.html
- Build validation: http://localhost:1338/tests/validation/index.html
All of those allows debugging the source code of bjs directly from typescript.
If you wish testing the fully compiled version instead of independant files simply append ?dist=true in the different urls.
You could also test against the minified version by choosing ?dist=min. this will work on all the referenced URLs.
Edit Code
Once the test task (gulp run) has been launched through gulp or VSCode, any TS or shader file save will automatically rebuild the associated js. Simply reload your browser to see the changes in effect and begin to debug your new code.
Hint: You may need to refresh the code before adding back a new breakpoint.
Local Dev
In order to simplify the quick testing and development. You can copy paste playgrounds code in the devLocal/src/index.js file . The entire devLocal/src folder is git ignored and is meant to be your local test folder.
You can launch it through: Local Dev: http://localhost:1338/localDev/index.html
From there you can easily add breakpoint in your playground js or the BJS ts files for debugging.
Adding in the url ?dist=true or ?dist=min will help testing against the built files.
As using only one test file is annoying, feel free to add index.1.js, index.2.js... and so on. In VSCode, copy pasting the file in the same folder results in creating the next available slot in the folder e.g. copy pasting index.1.js will create index.2.js.
To launch index.{number}.js simply append in the url sample={number} so for launching index.3.js against the unminified released files, use: http://localhost:1338/localDev/index.html?dist=true&sample=3
This should help playing andd debugging locally.
Validate changes
As part of your testing process, it is highly recommended to launch the build validator: http://localhost:1338/tests/validation/index.htm. It will run several scenes against a reference image to detect any visual changes.
Gulp
The main gulpfile in Tools/Gulp contains a lot of helpfull tasks. So first open a terminal (Ctrl+`) in VScode or your favorite terminal. Navigate to the Tools/Gulp folder and you are ready to run the following commands.
gulp runlaunches all the watchers and a web server (this is map to the test command in VSCode)gulp webserverlaunches the webserver only.gulp watchlaunches the watchers only.gulp typescript-allgenerates all the distribution files in the dist/preview release folder (This is map to the build command in VSCode Ctrl+Shift+b).gulp typescriptgenerates the BJS distribution files.gulp typescript-librariesgenerates all the library (materials, procedural textures...) files in the dist/preview release folder.gulp loadersgenerates all the loaders files in the dist/preview release folder.gulp serializersgenerates all the serializers files in the dist/preview release folder.gulp materialsLibrarygenerates all the materials files in the dist/preview release folder.gulp proceduralTexturesLibrarygenerates all the procedural textures files in the dist/preview release folder.gulp postProcessesLibrarygenerates all the post processes files in the dist/preview release folder.gulp canvas2Dgenerates the canvas2D files in the dist/preview release folder.gulp inspectorgenerates the inspector files in the dist/preview release folder.gulp deployLocalDevregenerates your localDev/src/index.js from the template.
Custom builds
By default, the build process will generate code for all classes in the repo. For size reasons you may want to strip out some classes that you are not using.
To do so, you will have to edit the config.json file from /tools/gulp folder.
This file starts like this:
    "build": {
        "filename": "babylon.max.js",
        "minFilename": "babylon.js",
        "minWorkerFilename": "babylon.worker.js",
        "declarationFilename": "babylon.d.ts",
        "declarationModuleFilename": "babylon.module.d.ts",
        "outputDirectory": "../../dist/preview release",
        "srcOutputDirectory": "../../src/",
        "currentConfig": "all"
    },
    "buildConfigurations": {
        "all": [
                "standardMaterial", "pbrMaterial", "freeCamera", "arcRotateCamera", "hemisphericLight",
                "pointLight", "directionalLight", "spotLight", "animations", "actions", "sprites", "picking", "collisions",
                "particles", "solidParticles", "additionalMeshes", "meshBuilder", "audio", "additionalTextures", "shadows",
                "loader", "userData", "offline", "fresnel", "multiMaterial", "touchCamera", "procedural", "gamepad",
                "additionalCameras", "postProcesses", "renderingPipeline", "depthRenderer", "additionalPostProcesses",
                "bones", "hdr", "polygonMesh", "csg", "lensFlares", "physics", "textureFormats", "debug", "morphTargets",
                "colorCurves", "octrees", "simd", "vr", "virtualJoystick", "optimizations", "highlights", "assetsManager",
                "mapTexture", "dynamicFloatArray", "serialization", "probes", "layer"
        ],
        "minimal": ["meshBuilder", "standardMaterial", "freeCamera", "hemisphericLight"]
    },
    "workloads" :
    {
You can see inside the buildConfigurations bucket that two configurations are defined: all and minimal.
A configuration is an array of workloads. Workloads are sets of file, shaders and dependencies. They define a set of work. You can use then to cherry pick only feature that you want to use.
For instance the minimal configuration only contains the following workloards: meshBuilder, standardMaterial, freeCamera, hemisphericLight.
You can change the active configuration by settings the build.currentConfig value (set to all by default).
Here is the list of available workloads:
| Workload | Description |
|---|---|
| standardMaterial | Contains standard material and associated shaders |
| pbrMaterial | Contains PBR material and associated shaders |
| freeCamera | Contains FreeCamera |
| arcRotateCamera | Contains ArcRotateCamera |
| hemisphericLight | Contains HemisphericLight |
| pointLight | Contains PointLight |
| directionalLight | Contains DirectionalLight |
| spotLight | Contains SpotLight |
| animations | Contains Animations and Animatables |
| actions | Contains Actions and ActionManagers |
| sprites | Contains Sprites and SpriteManager |
| picking | Contains PickingInfo and Ray |
| collisions | Contains Collider |
| particles | Contains Particle and ParticleSystem |
| solidParticles | Contains SolidParticleSystem |
| additionalMeshes | Contains GroundMesh, InstanceMesh and LinesMesh |
| meshBuilder | Contains MeshBuilder |
| audio | Contains AudioEngine, Sound, Soundtrack and Analyzer |
| additionalTextures | Contains CubeTexture, RenderTargetTexture, MirrorTexture, RefractionTextures, DynamicTexture, VideoTexture and RawTexture |
| shadows | Contains ShadowGenerator |
| loader | Contains SceneLoader, FilesInput and LoadingScreen |
| userData | Contains StringDictionary, Tags and AndOrNotEvaluator |
| offline | Contains Database |
| fresnel | Contains FresnelParameters |
| multiMaterial | Contains MultiMaterial |
| procedural | Contains the ProceduralTexture and CustomProceduralTexture |
| gamepad | Contains FreeCameraGamepadInput, ArcRotateCameraGamepadInput, Gamepads, ExtendedGamepad |
| additionalCameras | Contains FollowCamera, UniversalCamera and GamepadCamera |
| touchCamera | Contains TouchCamera and FreeCameraTouchInput |
| postProcesses | Contains PostProcess and PassPostProcess |
| renderingPipeline | Contains PostProcessRenderPipelineManager, PostProcessRenderPass, PostProcessRenderEffect and PostProcessRenderPipeline |
| additionalRenderingPipeline | Contains SSAORenderingPipeline, LensRenderingPipeline, HDRRenderingPipeline, StandardRenderingPipeline |
| depthRenderer | Contains DepthRenderer |
| additionalPostProcesses | Contains BlurPostProcess, RefractionPostProcess, BlackAndWhitePostProcess, ConvolutionPostProcess, FilterPostProcess, FxaaPostProcess, VolumetricLightScatteringPostProcess, ColorCorrectionPostProcess, TonemapPostProcess and DisplayPassPostProcess |
| bones | Contains Bone, BoneIKController, BoneLookController and Skeleton |
| hdr | Contains CubemapToSphericalPolynomial, PanoramaToCubemap, HDRTools, PMRemgenerator, HDRCubeTexture |
| polygonMesh | Contains PolygonMesh |
| csg | Contains CSG |
| lensFlares | Contains LensFlare and LensFlareSystem |
| physics | Contains PhysicsJoint, PhysicsImpostor, PhysicsEngine, CannonJSPlugin and OimoJSPlugin |
| textureFormats | Contains support for .tga, .dds and .ktc |
| debug | Contains SkeletonViewer, AxesViewer, BoneAxesViewer, RayHelper, DebugLayer and BoundingBoxRenderer |
| morphTargets | Contains MorphTarget and MorphTargetManager |
| colorCurves | Contains ColorGradingTexture and ColorCurves |
| octrees | Contains Octree and OctreeBlock |
| simd | Contains SIMD support for Math |
| vr | Contains VRDistortionCorrectionPostProcess, AnaglyphPostProcess, StereoscopicInterlacePostProcess, FreeCameraDeviceOrientationInput, ArcRotateCameraVRDeviceOrientationInput, VRCameraMetrics, WebVRCamera, DeviceOrientationCamera, VRDeviceOrientationCamera and StereoscopicCameras |
| virtualJoystick | Contains VirtualJoystick, VirtualJoysticksCamera and FreeCameraVirtualJoystickInput |
| optimizations | Contains MeshSimplification, MeshLODLevel and SceneOptimizer |
| highlights | Contains OutlineRenderer, EdgesRenderer and Highlightlayer |
| assetsManager | Contains AssetsManager |
| mapTexture | Contains MapTexture and RectPackingMap |
| dynamicFloatArray | Contains DynamicFloatArray |
| serialization | Contains SceneSerializer |
| probes | Contains ReflectionProbe |
| layer | Contains Layer |